Showing posts with label Photography. Show all posts

Wednesday, November 7, 2012

Baking a Pumpkin


 "Seems simple enough." I thought and you know what?! It is but I was intimidated for years by these cute little suckers. So how do I turn one of these into a pumpkin puree ready to bake with?


Cut your pumpkin in half.


scoop out all the guts (save your seeds to roast). I used a measuring spoon since it has a rougher edge.


look at all those pretty guts :) I've clearly been watching too much Dexter!


Add the pumpkin to a baking sheet fill with about 1/4 inch of water. Heat oven to 350 for 30-45 mins (for a 3-4 lb pumpkin).


Afterwards let it cool and scoop out all the flesh. Either use it right away of store in an airtight container for 2-3 days in refrigerator.


I ended up making some killer Pumpkin and toffee cookies for my husbands command. Lick my spoon has a great pumpkin toffee cookie, yum!


So get to cracking on those pumpkins, Thanksgiving is right around the corner.

Thursday, June 21, 2012

Canning Fresh Pineapples


Fred Meyer has this great sale going right now for pineapple that I could not pass up! We use pineapple lots of different dishes, baking, smoothies and just eating them out of the jar. At $1.00 each, this week is a great stock up price for these babies. I purchased 8 and cut only 6 for this canning recipe. It's super easy and fast compared to other canning recipes.


What you will need:

(6) fresh Pineapples
(16) Wide mouth Pint jars with lids
1/4 cup lemon juice
Canning equipment (avail at Walmart for cheap)
4 cups sugar
12 cups water
Med stock pot
Knives


Pretty simple steps here.

  • Cut the top and bottom off of the pineapple then cut (as close to the rind as possible) the rind off.
  • Either use a melon baller or pairing knife to cut out 'eyes' (pardon the phone picture) 
I chose a pairing knife to cut the eyes out. If you notice the eyes are in a diagonal pattern making it the finished pineapple look pretty.. to me at least.

  • Slice pineapple in half. Half the half pineapple. Cut the hard white core from the  1/4 pineapple.
  • Cut the 1/4 piece into 3 then crosswise cut into about 7-8 pieces. (save cores for syrup).
  • Place the sugar, cores and water in pot. Boil for 10-15 mins. (I added about 1/4 cup lemon juice)
  • Prep you jars according to canning method and recommendations.
  • Directly put the pineapple in prepped jars (pack them tight). Fill to 1/2 inch line.
  • Pour simple syrup into packed jars
  • Wipe rim with clean wet towel
  • Put lids and rings on
  • Can Pints for about 25 mins, Quarts for about 35 mins. 


Done!

I might dehydrate the other 2 pineapples or just freeze them for smoothies. What do you think I should do?


Monday, February 6, 2012

Snickerdoodle my dandy

I've have been very bad! With the start of my business I started slacking in my personal life and hobbies, who knew owning and running a business was such hard work?! One thing that has not slowed down has been my baking. I've been taking pictures I promise but have failed to post them so this is me posting {insert coy face} something from ..... 3 months ago.

I don't remember where the original recipe came from but over the years I've tweaked here and there and have come to this. Now when I bake this I generally am careless with the vanilla ext and butter. I will sometimes add more or less depending on my mood.

Sickerdoodles 

2 tsp Vanilla Ext
1 cup softened butter
1 1/2 cup granulated sugar
2 eggs
2 3/4 cup all purpose flour
2 tsp cream of tarter
1 tsp baking soda
1/4 tsp salt


For Rolling:

2 Tbs granulated sugar
2 tsp cinnamon


Okay so let's get to baking!!

1) Preheat to 400
2)  Cream together butter, sugar,eggs & vanilla until fluffy (about 30 seconds)
3) Blend flour, cream of tarter, baking soda & salt. Add dry mix to wet mix 1 cup at a time.
4) Mix the 2 Tbsp+cinnamon in bow, set aside.
5) Using cookie scoop, make balls and roll each ball into the cinnamon/sugar mixture.
6) Place dough 3 inches apart on ungreased or parchment lined cookie sheet.
7) bake 8-10 mins or until set but NOT hard.
8) remove and cool on rack.


 BAM, there you go! These have got to be one of the easiest cookies to make besides sugar cookies. Also on a side note I seem to have lost my fav lil milk glass shown in the picture {major sad face}. How does a glass grow legs and walk away?

Friday, July 1, 2011

Am I strong enough?

One thing that I have learned from Navy Sub life.... You have to be strong.

As a wife of a U.S Sailor and a mother of three, boys mind you. I often find myself being a single-non single parent for months at a clip. Those months apart are most challenging, the car will decide it no longer wants to work right, some household appliance will break down, your house gets torn apart from kids because there is no way you can be in four rooms at the same time to prevent disasters, emails are few and far between and almost always monitored by someone and if you're an unlucky one like some from our boat, the emails will be read and talked about with people who have no reason to know what was in it at all, you're deprived of sex and think about taking up stock in batteries, you learn what deployment insomnia is and you'll mumble and grumble "why does this only happen when he's gone?"

I'm also a person that NEEDS to stay busy, which I think might add to some of my stress. As a 7 1/2 month pregger I decided to re-paint the entire inside of our house....while he was at sea. I picked up armature photography, quilting, scrapbooking, couponing, gardening, baking, pretty much I strive to be a Martha Stewart clone minus the prison time.  I often have about 3 things I'm working on, right now it's a cathedral quilt, canning/baking, prepping to take senior pictures and the most time consuming...starting a business. Although I have my husbands full support and willingness to listen to my never ending talk about vendors, marketing and the future, he still isn't there to be 100% supportive.

Sometimes I get the "uh huh" or "oh cool" monotone response, I get upset but then have to remember that this man is putting in a 12hr shift of craziness known as Navy life. He is the only unfortunate person on his boat to be in 3 divisions and is tasked numerous things beyond the norm. I try to stay positive and supportive all while masking my own frustrations of the days business.

The pressure will build up over weeks and explode into a 'I'm not gonna cook you lil jerks anything to eat, go eat a bowl of cereal and mom is gonna go sit in the shower for 2 hrs, you better not bug me or mommy dearest will come out' mess(you like my run on sentence? good because I did). The kids sit there looking at each other trying to figure out why mommy has gonna coo coo.

I wonder sometimes how strong am I really? Can I really do this? Then I look at all the pictures in my house, I look at my husband, my children and know I not only have to be strong for me I have to do it for all of them......So I suck back all my emotions and frustrations and go through another day of a Navy Sub life.

These are all my knuckle heads :-)


What Navy tales do you have that makes you wonder "am I really strong enough for this?"

Thursday, June 30, 2011

Cherry Butter

Cherries have exploded in our house!!! There is cherry guts, cherry nuts, cherry blood lol... A local farmer provided us here in town with delicious Bing and Rainier cherries (Thank you guys). I bought 25lbs,yep that's right 25.What can you do with 25lbs of cherries?!!!
Here is what I made:
Cherry pie filling
Cherry Jam
Dehydrated cherries
Maraschino cherries
Candied cherries
and the feature for tonight..........

Cherry Butter


INGREDIENTS:

4 Cups pitted and pureed cherries
3 1/2 cups granulated sugar
3 T. butter
1/2 t. cinnamon
1/4 t ground allspice
1/2 t. almond extract
1/2 cup lemon juice
1 packet of Sure-jell pectin OR 10T. classic pectin


1) Wash and pit cherry
2) Combine cherries and sugar over med heat. Stir constantly until a roaring bubble, you don't want to burn the bottom.
3) Reduce to low heat. Stir in butter, spices and extract.
4) Add lemon juice and pectin, stir until well combined, about 5 minutes.
5) follow you basic water canning instructions


I'm sure you can do with out the pectin but I like the jell consistency. The next batch of butter I might also try adding a little more butter to the mixture as well.

This is one of the most amazingly tasty butters there is....seriously. Like I'm gonna have some for breakfast tomorrow morning. After you try this, let me know how it turned out for you.


Photo source:
applesandbutter
savvy eats

Monday, June 20, 2011

Strawberry cupcakes with Meringue butter cream

I went on a strawberry kick and bought 8lbs of these berries!! So after eating about 2lbs myself I decided I would make some yummy treats for family and friends. Now keep in mind this is a meringue butter cream so its a lot different than basic butter cream  (I actually like this kind much better)


 Strawberry Cupcakes:

Ingredients

  • 2 3/4 cups all-purpose flour
  • 1/2 cup cake flour, (not self-rising)
  • 1 tablespoon baking powder
  • 1 teaspoon salt
  • 8 ounces (2 sticks) unsalted butter, softened
  • 2 1/4 cups sugar
  • 3 large eggs
  • 1 large egg white
  • 1 cup whole milk
  • 1 1/2 teaspoons pure vanilla extract
  • 2 cups finely chopped strawberries, plus small strawberries for garnish

 Meringue Butter Cream Icing:

Ingredients

  • 4 large egg whites
  • 1 1/4 cups sugar
  • 1 1/2 cups (3 sticks) unsalted butter, room temperature, cut into tablespoons
  • 1 teaspoon pure vanilla extract
  • 1 1/2 cups (12 ounces) strawberry jam, pureed in a food processor

Directions

  1. In the heatproof bowl of an electric mixer set over a saucepan of simmering water, combine egg whites and sugar. Cook, whisking constantly, until sugar has dissolved and mixture is warm to the touch (about 160 degrees).
  2. Attach the bowl to the mixer fitted with the whisk attachment. Beat the egg-white mixture on high speed until it holds stiff (but not dry) peaks. Continue beating until the mixture is fluffy and cooled, about 10 minutes.
  3. Switch to the paddle attachment. With mixer on medium-low speed, add butter several tablespoons at a time, beating well after each addition. (If frosting appears to separate after all the butter has been added, beat on medium-high speed until smooth again, 3 to 5 minutes more.) Beat in vanilla. Beat on lowest speed to eliminate any air bubbles, about 2 minutes. Stir in strawberry jam with a rubber spatula until frosting is smooth.

    The source: Martha Stewart :) 


Saturday, June 11, 2011

DIY Saturday- Picture Notepad

At the first part of the year I participated something called "Pay It Forward 2011". Those that responded to it was to home make something and send it to 5 people. Each of those 5 people are to make something and send it to another 5 and so on. I'll admit I JUST now started making my pay it forwards for this year ( but hey I do have all 2011 to make stuff ).

With my oldest Graduating Pre-K I wanted to make something for his teacher and also figured I would knock out a Pay It Forward at the same time.


WHAT YOU NEED:

  • 2 Vertical 4x6 picture's 
  • Asst Paper 
  • Paper cutter or x-acto cutter
  • Clothespins or 2 binder clips
  • Elmer's white glue
  • Heavy books 
( I made a smaller size- 3x4)
STEP ONE: TRIM PAPER TO SIZE

Cut each paper into a 4x6 (same size as your photo's). I used a paper cutter which is much faster and easier but you may also use a ruler and x-acto knife.
You want your stack to be about 1/4 inch.


STEP TWO: GLUE PAPER


Tap the stack of paper until one side (short end)  is perfectly flush.
Clamp with clothespin or binder clip to keep the paper nicely lined up.
Apply glue evenly to short end and smear with finger.

STEP THREE: GLUE AGAIN AND ......AGAIN. 

Let the glue dry for about 10-15 minutes. Then re- apply glue and let completely dry. The layer of glue should be nice and thick (re-apply one more coat if needed and completely dry).
Ruffle the pages to make sure all is secure. If they do come loose apply more glue and let dry.

Place the print face out on top n bottom and re-clamp with clothespins or binder clip.

Sorry about the lighting change
STEP FOUR: MAKE THE PAPER STRIP

For the spine of the notepad cut a 4"  and about 3/4-1"  wide piece of sturdy paper.
Apply a thin layer of glue, smear with your finger.
Glue the strip onto the spine of the notepad.
Smooth the strip onto the photo with your finger, then bend the other side down onto the back cover and smooth that down. 
*If excess glue gets onto the face of the photos, wipe it away with a damp paper towel.


STEP FIVE: LET EM DRY

Stack the books onto and let em dry :)


I was amazed at how easy it was to make these. This is defiantly going to be a gift item in the future.

Thursday, May 26, 2011

Doughnuts Galore!!


makes 1 dozen doughnuts


1 (1/4-oz) package active dry yeast (2 1/2 teaspoons)
2 tablespoons warm water (105–115°F)
3 1/4 cups all-purpose flour plus additional for sprinkling and rolling out dough
1 cup whole milk at room temperature
1/2 stick (1/4 cup) unsalted butter, softened
3 large egg yolks
2 tablespoons sugar
1 1/2 teaspoons salt
1/2 teaspoon cinnamon
About 10 cups vegetable oil for deep frying


Stir together yeast and warm water in a small bowl until yeast is dissolved. Let stand until foamy, about 5 minutes. (If yeast doesn’t foam, discard and start over with new yeast.)

Mix together flour, milk, butter, yolks, sugar, salt, cinnamon, and yeast mixture in mixer at low speed until a soft dough forms. Increase speed to medium-high and beat 3 minutes more.
Scrape dough down side of bowl (all around) into center, then sprinkle lightly with flour (to keep a crust from forming). Cover bowl with a clean kitchen towel (not terry cloth) and let dough rise in a draft-free place at warm room temperature until doubled in bulk, 1 1/2 to 2 hours. (Alternatively, let dough rise in bowl in refrigerator 8 to 12 hours.)

Turn dough out onto a lightly floured surface and roll out with a lightly floured rolling pin into a 12-inch round (1/2 inch thick). Cut out as many rounds as possible with 3-inch cutter, then cut a hole in center of each round with 1-inch cutter and transfer doughnuts to a lightly floured large baking sheet. Cover doughnuts with a clean kitchen towel and let rise in a draft-free place at warm room temperature until slightly puffed, about 30 minutes (45 minutes if dough was cold when cutting out doughnuts).

Do not reroll scraps.

Heat 2 1/2 inches oil in a deep 4-quart heavy pot until it registers 350°F on thermometer. Fry doughnuts, 2 at a time, turning occasionally with a wire or mesh skimmer or a slotted spoon, until puffed and golden brown, about 2 minutes per batch. Transfer to paper towels to drain. (Return oil to 350°F between batches.)
I also fried the doughnut holes for about 1 minute and them tossed them in powdered sugar and cinnamon sugar straight out of the hot grease.


Gourmet, December 2006 and Joy the baker


Chocolate Glaze

recipe from Alton Brown

1/2 cup unsalted butter
1/4 cup whole milk, warmed
1 tablespoon light corn syrup
2 teaspoons vanilla extract
4 ounces bittersweet chocolate, chopped
2 cups confectioners’ sugar, sifted

  
Combine butter, milk, corn syrup, and vanilla in medium saucepan and heat over medium heat until butter is melted. Decrease the heat to low, add the chocolate, and whisk until melted. Turn off heat, add the powdered sugar, and whisk until smooth. Place the mixture over a bowl of warm water and dip the doughnuts immediately. Allow glaze to set for 30 minutes before serving.

*You can add sprinkles and other yummy toppings.

Friday, April 22, 2011

Cinnamon Pull-Apart Bread

 I came across this recipe from Joy Baker during one of my random cravings to bake something for the family. Ive always been a big cinnamon raisin bread girl, unfortunately I had none at the time I made this but a lemon type frosting sounds good too; maybe next time.

INGREDIENTS:

Dough:
2 3/4 cups all-purpose flour
1/4 cup granulated sugar
2 1/4 tsp. instant yeast
1/2 tsp salt
4tbsp. unsalted softened butter
1/3 cup whole milk * I used 2% milk
1/4 cup warm water
1 tsp. vanilla extract
2 room temp large eggs

Filling:
4 tbsp. unsalted butter
1 cup sugar
2 tsp ground cinnamon
1/2 tsp grated nutmeg


To make the dough, combine flour, sugar, yeast and salt in a bowl with dough hook. Combine the butter and milk in a small saucepan, heat until the butter is melted. Set aside and let cool until the temp is 115- 125*F. Add the milk mixture,water,vanilla and eggs to mixing bowl. Mix on low speed until dough forms. Continue to knead until smooth and elastic, adding additional flour as need (1 tbsp at a time) until the dough no longer sticks to the side of the bowl and is tacky NOT sticky. Knead about 3-5 minutes. Transfer the dough to a lightly oiled bowl, turning once to coat and cover. Let rise in a warm place for about 1 hour or until it doubles in size.

*while dough rises add the butter to a small saucepan and melt until browned. Set aside. Combine the sugar, cinnamon and nutmeg in a small bowl and mix well.

Transfer dough to LIGHTLY floured surface and gently deflate. roll into a ball, cover and rest for another 5 minutes. Roll out into a 12x20 rectangle. Brush dough with browned butter
 Sprinkle cinnamon sugar mixture over the dough (yes ALL of it) in an even layer. Slice dough vertically into 6 even strips.
 Stack the strips on top of each other and then slice again into 6 slices.
 Place into a lightly greased (make sure to grease well) 9x5 loaf pan. Cover with clean towel and sit for 30-45 minutes.
Preheat oven to 350*F. Bake 30-35 minutes, until the top is golden brown. Remove from oven and let rest for 20-30 minutes. Run knife around the edges to loosen and carefully turn the loaf out, transferring to serving plate. Serve warm but also taste yummy the day after ( it has a cinnamon toast crunch flavor to it)
 Absolutely delish and if I wasn't making Ice Box cookies now, I would make this today too. Take a try at this recipe and let me know how it turns out.

Tuesday, April 19, 2011

Going to the Extreme

As usual I have taken on more things besides Photography, Baking, Quilting, Party Planning, Organizing and the basic errands and to-do list I have decided after a few years of pondering that I would start my own business!! I've been researching the market and started writing a business plan. Thanks to the help of Business PlanMaker
They have tons of templates that help you step by step along with a business plan writing course. I find myself ALWAYS picking up more and more things to occupy myself from the mundane so why not add ANOTHER thing like.............................

EXTREME COUPONING


I'm sure you might have heard or even watched this very fascinating show of people who you would swear are out of their minds and hoarders. BUT they must be doing something right!!

I have a family of 5!! 3 boys, my husband and I live on a single military income and many of you might know how tight that can be. Now we're not doing bad but we certainly could use the extra stretching in our budget. I am not looking to become a hoarder who has 1year supply of toilet paper, bread,etc but I am looking to stockpile for the family for at least 4-6 months ( thats the long term goal ) but I'll be happy with just a month stockpile the first year.

This week so far I have scored a sweet deal from NIVEA body wash for men and woman...get this...this was all FREE!!!


At $3.04 - $3.97 a pop I only paid sales tax on this...now I have 9 more coupons for the woman ( which is all sold out through out town) so I plan on scoring some more before the sale is up.

So on top of my crazy busy schedule I've now added prepping for a new business and some extreme couponing. What do you do that makes you think " am I nuts for adding this to my daily schedule?"

I might be nuts but I'm gonna be saving some major moola

Thursday, April 7, 2011

Raina Skye Photography GIVEAWAY!!

It's a PINUP photo shoot giveaway!!!

we'll call it 'SPREAD THE ALOHA GIVEAWAY' with Raina Skye , this is a giveaway to celebrate Raina Skye Photography gaining 1000 Facebook fans and YOU!!

If you don't already know,  Raina Skye Photography is one of the most incredible photogs in the Kitsap areas. They transform those special moments into lasting memories with photos that you can keep for all time.


Raina Skye Photography

Raina Skye Photography offers different sessions from Children ( like the one above), Engagements and Weddings,

and she also donates her time to do Op Love Sessions for Military.

 SO ONTO THE GIVEAWAY!!


It's simple!

All you have to do is go to her Facebook fan page  and 'LIKE' it, tell her who sent you THEN (most importantly) go to her BLOG and make a comment on that page. This is a session that would cost you $160 or higher. AWESOME!!!!  Spread the ALOHA and gain a better chance at winning a session.

READY, SET, GO!

Easter Cookies


I'm not normally an Easter kind of person, I could go on and on about my beliefs but I'll refrain. Although I don't normally celebrate this holiday I did however have an urge to make some Easter cookies and what better way to test my hand once again at Royal Icing.
Normally I have meals and desserts planned out, organized and written down in a calendar but there are times that my impulses get a hold of me and I make things that are not normally in my scheduled menu. Yes I'm that anal about things, I must stay organized otherwise my world feels out of control...more on that later. 

 
ROLL OUT COOKIE INGREDIENTS: 
 Printer Friendly Version


1 Cup unsalted butter, softened
1 1/2 Cup granulated sugar
1 Egg
1 1/2 Teaspoon vanilla extract 
1/2 Teaspoon almond extract
2 3/4 Teaspoon baking powder
1 Teaspoon salt


Preheat oven 400F. Cream butter with sugar until light and fluffy. Beat in egg and extracts. Mix flour, baking powder, and salt. Add to butter mixture one cup at a time, mix well after each addition. Divide dough into 2 balls and on a floured surface roll out into a round about 12 inch circle that is 1/8 thick. dip cookie cutter into flour each use and place cookies on a ungreased cookie sheet. Bake for 6-7 minutes or until cookies are lightly browned.


Tuesday, March 15, 2011

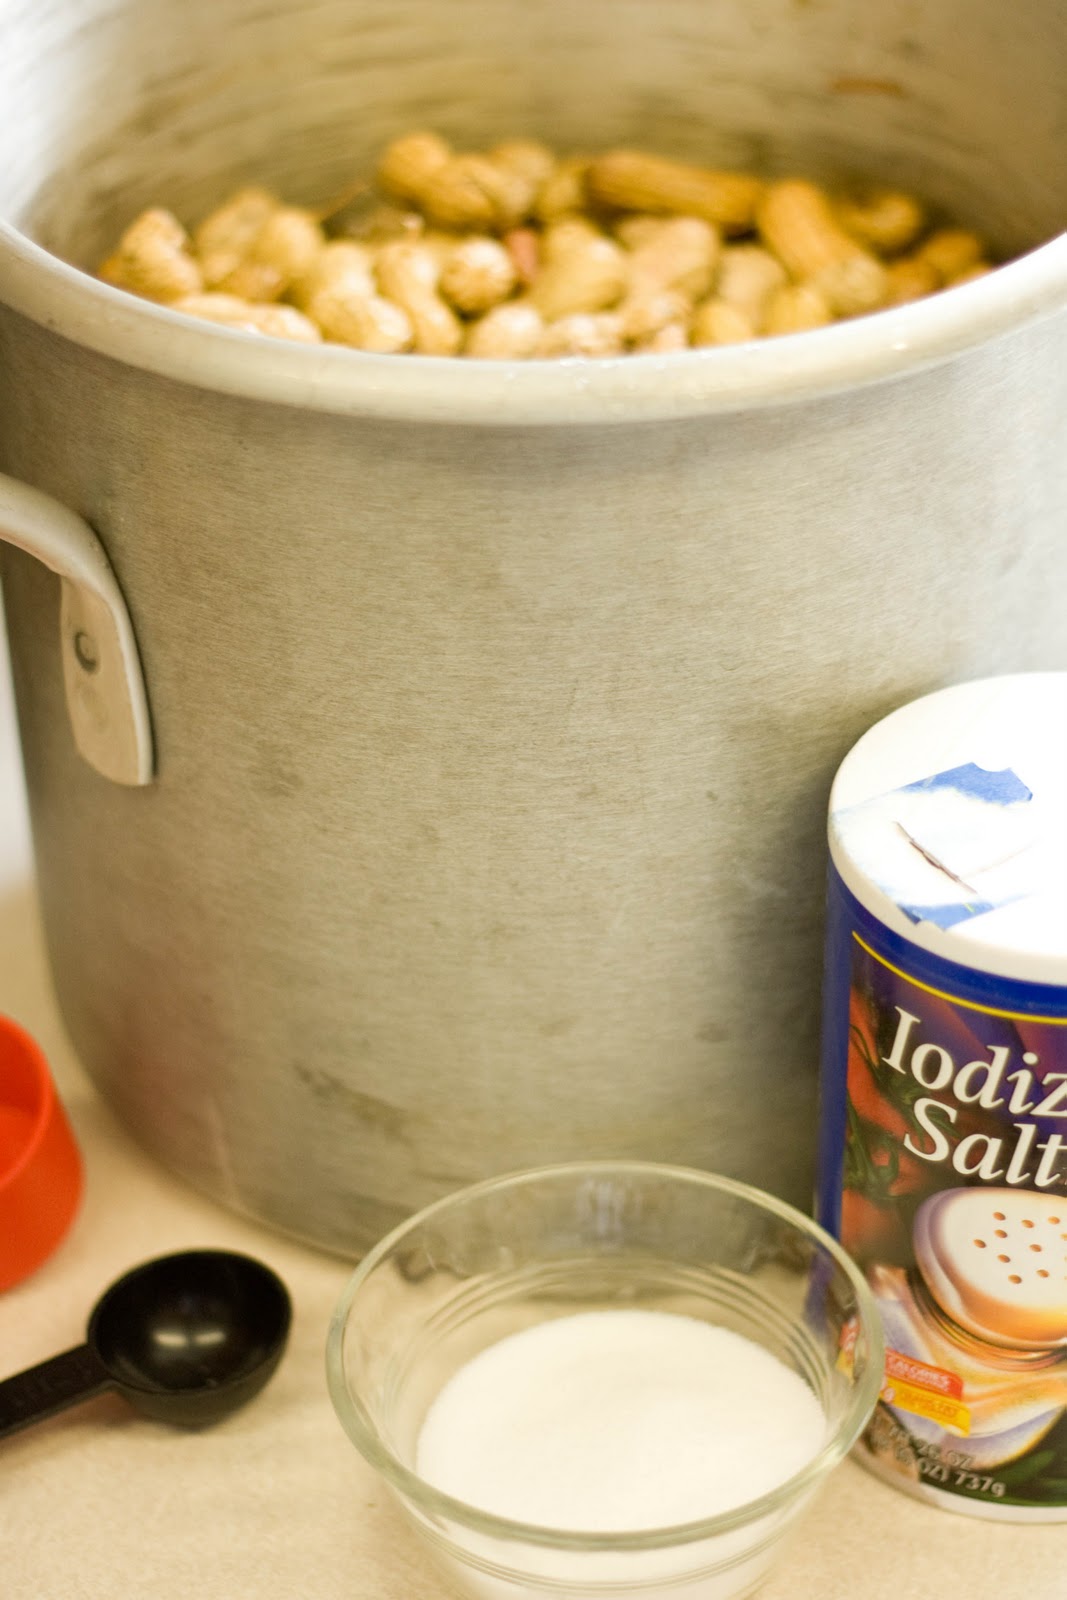
Boiled Peanuts

 I'm back from my month long hiatus, a well needed one at that. We enjoyed a family vacation down in SoCal and a couples getaway to the one and only SIN CITY. We actually made out with about $75 more then we had in the first part of the trip.

 Coming back to this COLD RAINY place I wanted to have something that reminded me of warmth.....that's where boiled peanuts come from. I lived in Georgia for about 5 years before I had my first boiled peanut and was hooked ever since. Georgia, Southern Georgia at that is a very warm place with corner boiled peanut stands, convenient store boiled peanuts, jarred boiled peanuts, canned boiled peanuts, all in different flavors and heat temps.

 Boiled Peanuts hands down are best in conjunction with either beer, cola, or SWEET tea. Traditionally they are eaten outside where it doesn't matter if wet shells are tossed or spit on the ground. Before I ramble more onto the recipe I used.


INGREDIENTS:
2lbs RAW or GREEN peanuts
1/4 cup Salt
2 Tablespoon Salt
1/4 cup Cajun seasoning

Only use peanuts that are green (uncured). Do not attempt this recipe with roasted peanuts.
 Wash unshelled peanuts in cold water until the water runs clear. Soak peanuts in water for 20-30 minutes. Put peanuts in large pot fill to 2 inches above peanuts, cover peanuts with water.
 Pour Salt and Seasoning

The normal salt/water ratio is:(Add 1 cup of salt per gallon of water.) but as you can tell I didn't do that. 
Cook, covered on high heat for about 4-7 hours. Some like firmer peanuts while other like softer one, it's up to you. After 4 hours taste test for both texture and salt.
Womansday.com
 Once they are done drain the water otherwise the peanuts with sit and absorb the salt and become over salted.  
nandyala.org
Freezing boiled peanuts:  Prepare peanuts as indicated above. Drain, allow to cool, and freeze in airtight containers. They keep indefinitely.

Canning Boiled Peanuts: 
Prepare peanuts and brine the same as for boiling for immediate use.

Pack peanuts into jars to within one-half inch of the top, using equal weights of peanuts and hot brine (212°F).
Partially submerge containers in upright position in boiling water for 10 minutes.
Seal while hot and process 45 minutes at 10 pounds pressure. Cool containers in water, label, and store away from heat. 


Friday, January 28, 2011

Drinks and Quality time.

As many of you know, I'm a mother of 3 very energetic and crazy boys. Time for me is precious and very limited when it comes to things I want to do personally. After a crazy week Val and I NEEDED ( can you sense the urgency of that?) to get away from everything, unwind and have some girl talk. We hit up the local 'Red Lobster' and ate and drank till our hearts were satisfied.

most yummy food ever!

This is Val.
 I often feel like I don't do enough for my boys, that the time spent with them is not quality time. I have set it in my mind to take at least 30 minutes from my day to spend with each individual child and spend another hour with all 3 of them doing something fun and enjoyable.
It was play day in Aiden's room.
 So far I have noticed an improvement in their overall attitudes and I get more smiles now ( AWESOME!!) so maybe there is something to this quality time,huh? I just hope I remember to bring my camera out .
reading books are a fav in this family.

Related Posts Plugin for WordPress, Blogger...